A Powerful Blog Post Template for Maximum Traffic
Share This Post, Choose Your Platform!
A Powerful Blog Post Template for Maximum Traffic
Share This Post, Choose Your Platform!
Welcome back, friends! Today, I’m going to share with you a blog post template that you can copy for your own content, that will help you keep people on the page longer, and take the action that you want them to take, whether that’s read another blog or sign up for your email list or something else.
This post applies to anyone who writes blogs. Whether it’s for your own website, or for your clients’ sites, this blog post template will help you.
What I’m going to share is a small segment of what I teach in my course, How to Blog Like a Pro. If you use the code 33off at checkout, you’ll get 33% off. Yay! Discount.
Alright, let’s get started.
Psst! If you prefer video over text, check this out.
Blog Post Template 101: How to Hook Readers… and Keep Them Hooked
We’re going to break the blog up into three main sections:
- The introduction.
- The body of the blog.
- The conclusion.
And we’ll go through each one separately. I’ll also show you an example using my own blog content, just to illustrate it a little better.
Let’s start with the introduction.
1. How to Format the Introduction for Your Blog
The introduction can make it or break it all. You have maybe three seconds to get readers’ attention. You have to hook the reader, fast.
Here are a few ideas:
You can ask the reader a question. It might start with, “Have you ever felt like…” or “Have you ever experienced…” The point is to get their attention and make them go, “Oh, yeah, this is so me.”
A second idea: Start with a statistic.
Including stats is a simple way to show people that you’ve done your research and you’re not just talking out of your bum.
A third idea: Try relating to the reader on a personal level.
You won’t always be able to do this, like if you’re writing for a client and you don’t actually get credit for the work. But if you can get away with it, you can share with the reader how you can relate to this topic, and why you’re qualified to write about it.
Ask a question. Share a statistic. Get personal.
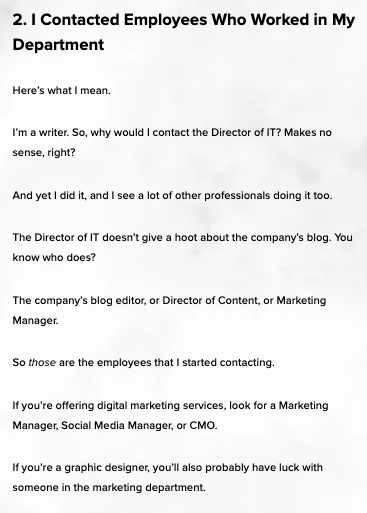
Let’s look at an example. In this blog, I immediately start off with a question, before going into a little more detail. Here’s a screenshot.
Keep it Concise
After you hook the reader, you want to get to the point and make clear what the blog is about. Give them an idea of what they’re about to learn and why they should keep scrolling.
Keep it concise. You don’t want your introduction to go on and on. People want the meat of the blog post. They just want their questions answered. So, give them what they need.
In our example blog, I end the introduction by telling them exactly what the rest of the blog post will cover.
That brings us to Section 2…
2. The Body of the Blog
This is where you get into the nitty-gritty. Whatever your readers are coming to your blog for, this is when you give it to them.
But, this is of course all about how to build a blog post template, so more specifically, what should the body of the post look like?
Something really important to keep in mind is that you want your blog to be skimmable. This is because a lot of people aren’t going to read your blog word for word. They’re going to skim it.
So you want to make it so that people can skim your blog and still get what they need out of it.
And also, even if they are reading it word for word, reading huge blocks of text is painful. You want to make your blog formatting easy on the eyes and easy to read. You want people to feel like they can read it quickly.
One great way to do this is with headings. I’m talking about these guys:
In whatever CMS, or content management system, you’re using, there’s a way to highlight text and turn it into a heading — an H2, H3, and so on.
Let’s talk about how this works.
You now know what a heading is, but what do the numbers mean?
The H1 is the title of your blog. And you only ever want one H1, so don’t add any extras within the blog itself.
H2s, you can have multiple. H2s should highlight the main points, the broadest points of the topic, of the H1. Think of it like this: If you were to create an outline of your blog, or maybe you already did, what would be the main points you would outline before breaking it down further?
Those are your H2s.
And it continues to break down from there, into H3s, and so on.
You won’t always get into H3s, and that’s okay. But you should definitely have at least one H2, for both the reader and also for your SEO health.
Optimize Your Headers!
And on a related note, your headings, especially H2s, are a great place to use your keyword. This is a very standard SEO best practice. If you want more help learning about keyword research, grab my free guide.
Be strategic with these. Don’t throw something into an H2 just for the sake of having one. Remember, people are going to naturally be drawn to your headings when they’re reading your blog. The font is usually much bigger. So use headings to get your main points across.
Another way to make your content more skimmable and easy to read is to write in shorter paragraphs. I know that when I was in school, we were taught that a paragraph needed to be at least five sentences.
But that was before we were writing for the internet, where people have the attention span of a goldfish.
These days, your paragraphs might be one sentence, and that’s fine. Break up your paragraphs where it makes sense, but if you’re drifting into huge chunks of text, people aren’t going to stick around to read that. If we zoom out on my sample blog, we can see: I hardly ever write in traditional paragraphs!
Something else to incorporate into the body of your blog to make it more reader-friendly? Lists, whether it’s with numbers or bullet points.
Lists help to create more white space on the page, which is a good thing, and they’re also really easy to… skim.
Lastly, images. And videos. You can add both to your blog. They help to break up the text and give the reader something pretty to look at. And videos are especially powerful because if the reader wants to watch them, it forces them to stay on your page longer, which is gold for your site performance and rankings.
This brings us to the third section…
3. The Conclusion
If there were ever a part of a blog that readers seem to not care about, it’s the conclusion. Which is sad.
You can use the conclusion as a very powerful tool in two ways.
For starters, you can use it as an opportunity to recap what you just discussed. You can summarize it. This is good for those readers who kind of just glance through the content, or really quickly skim it. Sum up the main points — which you can just steal from your H2s — at the very end.
This is also an excellent place to include a call-to-action or a CTA.
What do you want the reader to do next? You don’t want them to just… leave. You want to get them to take action. Is there a related blog you think they’d enjoy? Call it out and link to it.
Do you have a free guide you want them to sign up for? Call it out and include the link or embed the form right on the page.
Use this opportunity to make one last impression on them and try to grow your relationship further.
A Note on CTAs
I also recommend you throw a subtle CTA somewhere in the body of your blog, mostly for the people who don’t make it to the end, which is going to happen. Personally, I don’t think it’s wise to assume that everyone will make it to the conclusion because they won’t. So, hit them with a CTA earlier on.
I often do this with both my blogs and my YouTube videos. In fact, I did it in this blog. Muah-ha!
Formatting matters, and using this kind of blog post template can really make for a better reader experience. Put that extra effort into your content, take pride in your work, be obsessed with quality, and I promise you, it’ll pay off.
If you want more expert help writing blogs that get more traffic and rank higher in Google, don’t forget that I’m offering you 33% off enrollment in How to Blog Like a Pro. Just use the code 33off.
(Did ya notice that CTA?)


